Bytesveda

Fundamentals of Computer Science

Modems in Everyday Life: Installing a modem

In our last blogpost, we discussed how you can search for a modem that would best suit your needs.  As a reminder, when searching for a modem, it’s important to ensure it’s compatible with your internet service provider.   

Knowing how to replace a modem can come in handy when you’d like to increase your internet speeds, or if your previous modem has failed. It can be daunting at first, but we hope this two-part series will take the guesswork out of it for you!

Almost all modems have three ports. 

An ethernet port for internet going out, 

power port, and a 

A port for coaxial cable. The coaxial input comes from a port in your wall, and is connected to your Internet Service Provider (ISP).

The new cable modem we got - a 1.4 GBPS ARRIS surfboard.

The first step when you unbox your new modem is to:

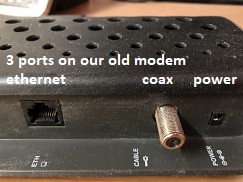
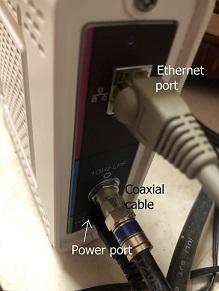
1. Connect the coaxial cable from the wall and into the coaxial port. This will get internet from your service provider to your modem.

2. Then, take an ethernet cable and connect it from the modem to your wireless router. This will allow internet to flow from the modem to the router, where multiple devices, either wired or wireless, can access it.

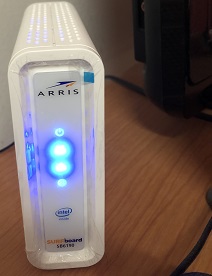
3. Next, Connect the power. Once this happens, you should see some lights come on on the front of the modem.  

Other end of the ethernet port goes to your router or PC.
Once the 3 ports are connected, you should see lights come on.

4. At this stage, you’ll need to call your ISP to let them know you’ve installed a new modem. ISPs like Spectrum or AT&T or whoever you have your internet subscription with, need to know where to send their internet.  Even though the modem is in the same physical location as before, each modem has a unique identification number that the ISP will need. Your provider’s customer service representative will walk you through to make sure each step is completed and they can connect to the modem on their end.

And just like that, you’ve replaced your modem!